How to Clean Windows Like a Pro: Expert Tips for Crystal Clear Results
Cleaning windows is often one of the most dreaded chores on the household cleaning list. However, it is also one of the most rewarding, as sparkling clean windows can brighten a home, enhance its aesthetics, and even improve energy efficiency. While many people may approach window cleaning with basic tools and a bit of elbow grease, professional window cleaners employ a variety of techniques that lead to flawless, streak-free results. In this comprehensive guide, we will explore expert tips, tricks, and the essential tools needed to clean windows like a pro.
The Importance of Clean Windows
Before diving into the methods and techniques for window cleaning, it is essential to understand why maintaining clean windows is so important:
1. Aesthetic Appeal
Clean windows significantly enhance the overall appearance of your home. Whether viewed from the inside or outside, spots and streaks on windows can detract from your home’s beauty. Clean windows allow natural light to brighten your living space, creating a more inviting atmosphere.
2. Improved Energy Efficiency
Clean windows allow for optimal sunlight to enter, reducing the need for artificial lighting during the day. This can lead to lower energy bills and a more environmentally friendly home.
3. Extended Lifespan of Windows
Dirt, grime, and pollution can damage window surfaces over time. Regular cleaning helps prevent permanent stains and keeps windows in good condition, prolonging their lifespan and reducing the cost of replacements.
4. Better Indoor Air Quality
Dust and allergens can accumulate on windows and around sills. By cleaning your windows regularly, you improve indoor air quality, which is especially important for allergy sufferers.
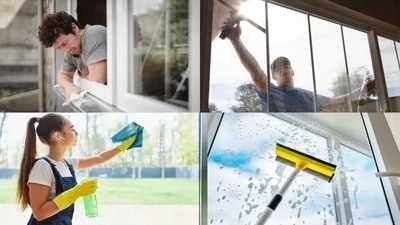
Essential Tools and Materials for Window Cleaning

To achieve professional results, you need the right tools. Here is a list of essential equipment and supplies for effective window cleaning:
1. Squeegee
A high-quality squeegee is a must-have tool for streak-free windows. Look for one with a rubber blade and a comfortable grip. A larger squeegee can cover more surface area, but a smaller one can be useful for tight spaces.
2. Bucket
A sturdy bucket will hold your cleaning solution and provide a place to rinse your squeegee. Consider a bucket with measurement markings for mixing solutions accurately.
3. Cleaning Solution
You can use a commercial window cleaning solution or create your own with simple ingredients. A popular homemade solution includes equal parts of water and vinegar, with a few drops of dish soap for added cleaning power.
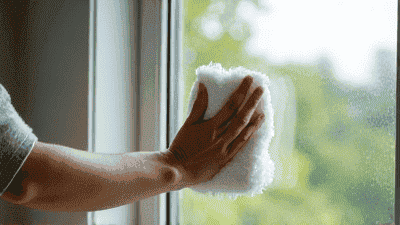
4. Microfiber Cloths
Microfiber cloths are perfect for wiping down windows, sills, and frames. They are highly absorbent and do not leave lint or streaks.
5. Scrubber or Sponge
A scrubber or sponge will help you apply the cleaning solution and agitate any stubborn dirt or grime. Look for one that is safe for glass surfaces.
6. Extension Pole
For high windows, an extension pole compatible with your squeegee can help you reach without needing a ladder. This is especially useful for difficult-to-access windows.
7. Ladder (if necessary)
For particularly tall windows, a sturdy ladder may be necessary. Always prioritize safety when using a ladder, ensuring it is stable and positioned correctly.
8. Gloves
Rubber gloves protect your hands from harsh chemicals and allow for a better grip on tools.
9. Old Towels or Rags
Having some old towels or rags on hand is useful for drying or wiping up spills and excess cleaning solution.
Techniques for Professional Window Cleaning
Now that you have your tools ready, let’s move on to the techniques that will help you clean windows like a professional.
Step 1: Choose the Right Time
Timing is essential when it comes to cleaning windows. The best time to clean windows is on a cloudy day or in the early morning or late afternoon. Direct sunlight can cause the cleaning solution to dry too quickly, leading to streaks. By choosing an overcast day, you give yourself ample time to work without worrying about the solution evaporating.
Step 2: Prepare Your Cleaning Solution
If you are using a commercial cleaner, follow the instructions on the bottle. For a homemade solution, mix equal parts water and vinegar in your bucket. Adding a few drops of dish soap can help cut through grime, making the solution even more effective.
Step 3: Remove Dust and Dirt
Before applying the cleaning solution, it is important to remove loose dirt and dust. Use a dry microfiber cloth or a duster to wipe down the window sills and frames. This step prevents dirt from mixing with the cleaning solution and potentially creating streaks.
Step 4: Apply the Cleaning Solution
Use a scrubber or sponge to generously apply the cleaning solution to the window. Start at the top of the glass and work your way down. This method ensures that any dirty water runs down the glass, preventing it from re-contaminating already cleaned areas.
Step 5: Scrub and Agitate
Gently scrub the window surface using your scrubber or sponge. Pay close attention to corners and edges, where dirt and grime tend to accumulate. Use a circular motion for stubborn spots or marks, then wipe away the dirt with the scrubber.
Step 6: Squeegee the Window
Now comes the key to achieving a streak-free shine—using the squeegee. Follow these steps for optimal results:
Start at the Top: Position the squeegee at the top corner of the window. Press it firmly against the glass to create a seal.
Pull Down in a Straight Motion: Pull the squeegee straight down to the bottom in one smooth motion. Use even pressure to prevent streaks.
Wipe the Blade After Each Stroke: After each stroke, wipe the rubber blade with a clean cloth to remove any dirt or solution before continuing. This is critical for maintaining a streak-free finish.
Overlap Your Strokes: For large windows, slightly overlap each squeegee stroke. This ensures full coverage and minimizes the risk of leaving any dirty streaks behind.
Step 7: Wipe Down the Edges
Once you have finished squeegeeing, take your microfiber cloth and wipe down the edges of the window and sill. This action will remove any drips and prevent water from settling in those areas.
Step 8: Clean Window Frames and Sills
Using a damp microfiber cloth, clean the window frames and sills. These areas often collect dust and dirt, and cleaning them will enhance the overall appearance of the window.
Tips for Avoiding Streaks

Even experienced window cleaners can occasionally struggle with streaks. Here are some expert tips to help you avoid this common problem:
1. Use Distilled Water
If your tap water has a high mineral content, it can leave deposits on glass. After cleaning, these minerals can dry as streaks. To prevent this, use distilled water in your cleaning solution.
2. Clean with Horizontal and Vertical Strokes
Instead of following a single direction with your squeegee, alternate between horizontal and vertical strokes. This technique allows you to identify any missed spots more easily.
3. Consider the Rubber on Your Squeegee
Over time, the rubber blade on your squeegee can wear out. Make sure it is in good condition and free of nicks or cuts that could cause streaks. Replace it as necessary to maintain optimal performance.
4. Adjust Your Technique for Different Glass Types
If you are cleaning treated or tinted glass, take extra precautions. Consult the manufacturer’s instructions for cleaning to ensure you are not using any solutions or techniques that could damage the glass.
Cleaning Hard-to-Reach Windows
Some windows can be particularly challenging to clean, such as those on higher floors or in awkward locations. Here are some tips for tackling these difficult areas:
1. Use an Extension Pole
For tall or hard-to-reach windows, an extension pole with a squeegee attachment can be a game changer. This tool allows you to clean from the ground without needing to use a ladder, ensuring safety while achieving great results.
2. Employ a Ladder Safely
If using a ladder is necessary, ensure you follow safety protocols. Have a partner hold the ladder steady, and never overreach while on the ladder. Always ensure the ladder is placed on stable ground.
3. Plan for Outdoor Windows
When cleaning outdoor windows, consider using a garden hose to rinse them off before applying your cleaning solution. This step helps remove any loose debris and can simplify the cleaning process.
4. Use a Cleaning Kit for Outdoor Windows
Commercial window cleaning kits are available with specialized tools designed for hard-to-reach areas. Consider investing in a kit that includes items like extension squeegees, high-reach scrubbers, and microfiber cloths.
Specialized Window Cleaning Techniques

Depending on the type of windows you have, you may need to adjust your cleaning approach slightly. Here are some specialized techniques for various window types:
1. Double-Hung Windows
Double-hung windows can usually be tilted inward for easy cleaning of both the interior and exterior glass. Familiarize yourself with the window's mechanism to safely access both sides.
2. French Doors
When cleaning French doors, tackle both panes of glass at the same time. Use the same techniques as above, ensuring you give special attention to the edges where dust can accumulate.
3. Skylights
Cleaning skylights requires extra care due to their positioning. Use a ladder or extension pole to reach them safely, and be mindful of any slippery surfaces. Due to their angle, dirt may slide down, so take extra time to wipe the edges and corners thoroughly.
4. Storm Windows
For storm windows, it’s often best to remove them for thorough cleaning. If you do not wish to remove them, ensure you clean both the interior and exterior panes effectively.
5. Decorative or Stained Glass
Stained glass or decorative windows often require a gentle touch to avoid damaging the designs. Use soft cleaning solutions and avoid scrubbing too harshly. Always check the manufacturer’s recommendations for care.
Scheduling Regular Window Cleaning
Regular maintenance is key to keeping windows clean and maintaining their integrity. Here’s how to establish a cleaning schedule that works for you:
1. Assess Your Environment
Consider your location and environment when scheduling window cleaning. Homes in areas with high pollen, dust, or pollution may require more frequent cleaning than those in cleaner environments.
2. Create a Seasonal Schedule
Many homeowners find success with a seasonal cleaning schedule. Clean your windows at least four times a year—once each season—to maintain cleanliness and optimal appearance.
3. Incorporate Window Cleaning into Spring Cleaning
Spring cleaning is a great time to tackle everything in your home, including deep cleaning your windows. As part of this annual ritual, ensure your windows are spotless and ready to welcome the sunshine.
4. Pay Attention to Special Occasions
If you’re hosting events or gathering, consider cleaning your windows in advance. Prepare for holidays, family gatherings, or other occasions by giving your windows extra attention before guests arrive.
Conclusion
Cleaning windows like a pro does not have to be a daunting task. Armed with the right tools, techniques, and a bit of practice, you can achieve crystal-clear results that greatly enhance the appearance of your home. By understanding the importance of regular window cleaning and incorporating these expert tips and strategies, you’ll enjoy bright, inviting spaces filled with natural light.
Remember that window cleaning is a skill that improves with practice. Schedule regular cleaning times, and don’t hesitate to try different techniques until you discover what works best for you. With dedication and attention to detail, your windows will shine brilliantly, creating a welcoming atmosphere in your home for years to come.